This easy yuzu curd recipe needs just 5 ingredients—egg yolks, yuzu juice, sugar, butter, and lemon zest—for a smooth, creamy citrus spread with a bright, sweet flavor.
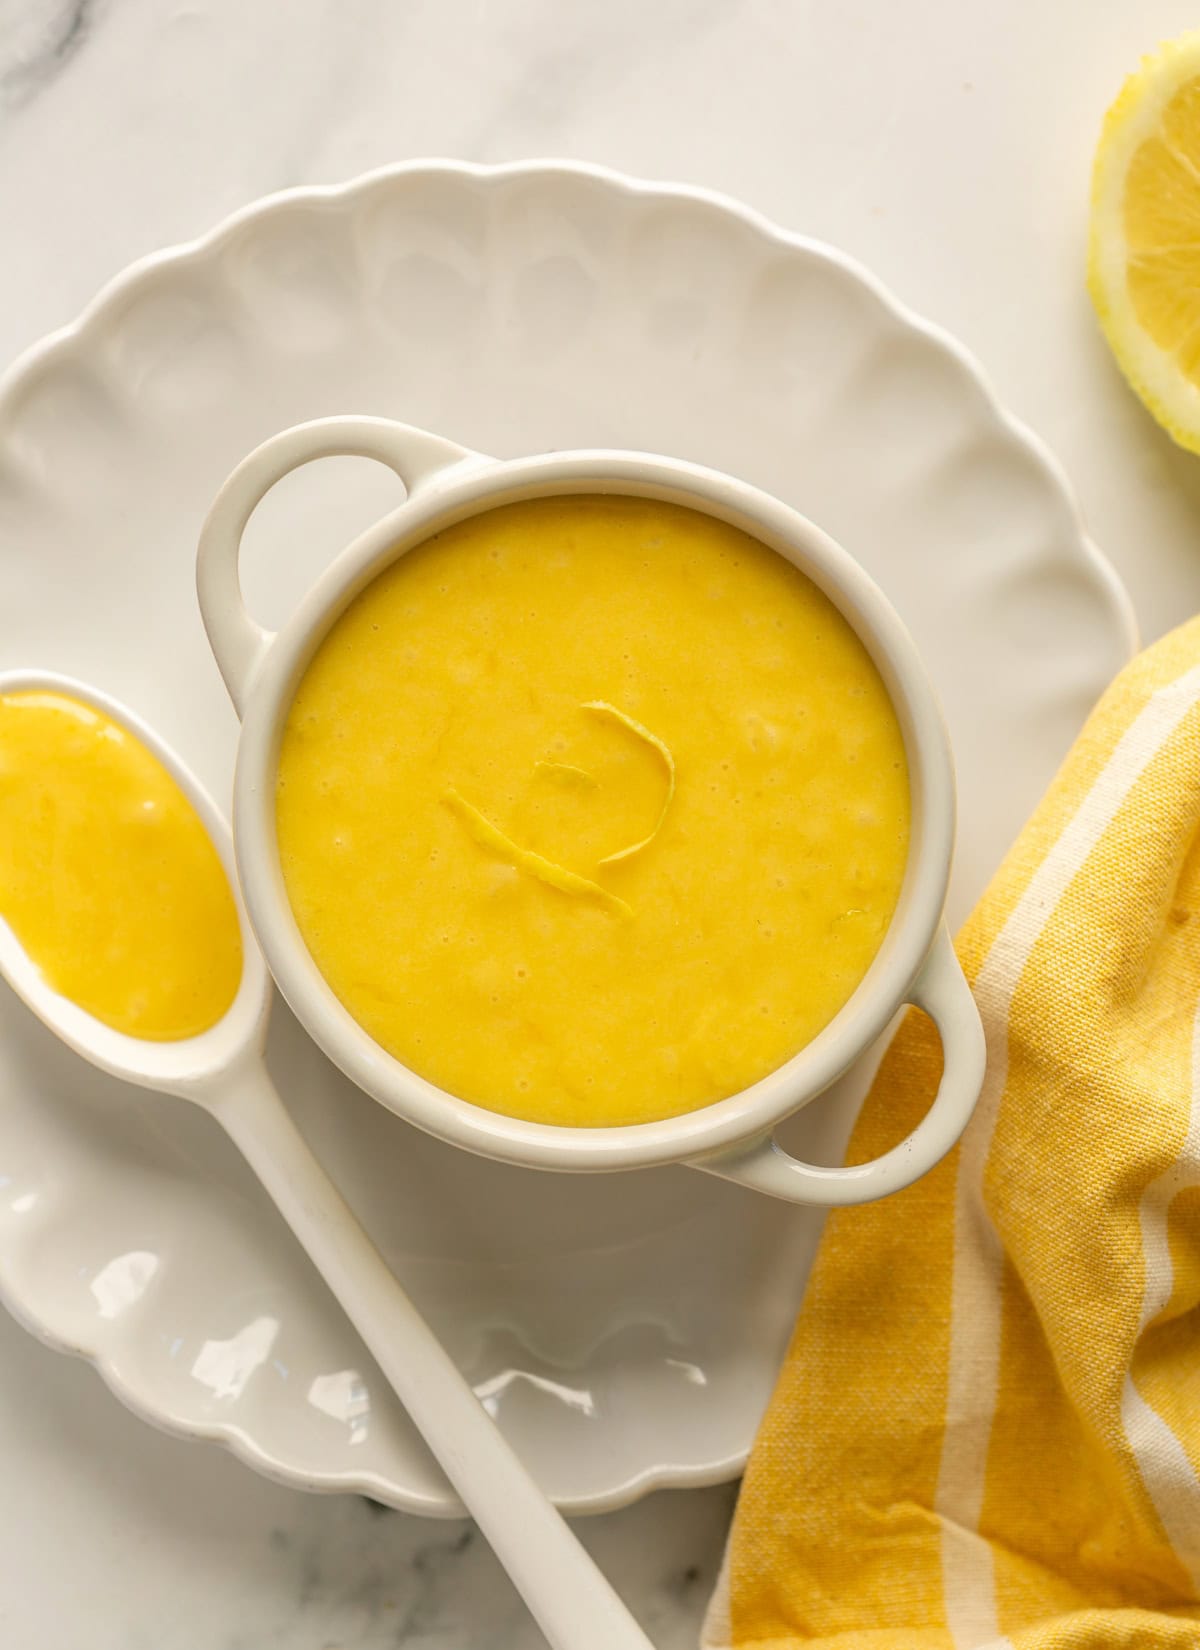
There’s something magical about this yuzu curd. It’s smooth, silky, and bursting with bright citrus flavor — like sunshine in a jar!
Whether you spoon it over yogurt, spread it on toast, or use it to fill a tart, it always feels like a little treat.
I used to think lemon curd was one of those fancy treats only pastry chefs could pull off — but once I made it at home, I was hooked!
After making it for years, I started playing around with other citrus flavors, and after my orange curd recipe, this bright, zesty yuzu curd came to life.
All you need are 5 simple ingredients, a bit of stirring, and the right tips (which I’ll share below!).
Best of all, you don't need a double boiler, or the water bath method to make it —though you can absolutely use one if you prefer!
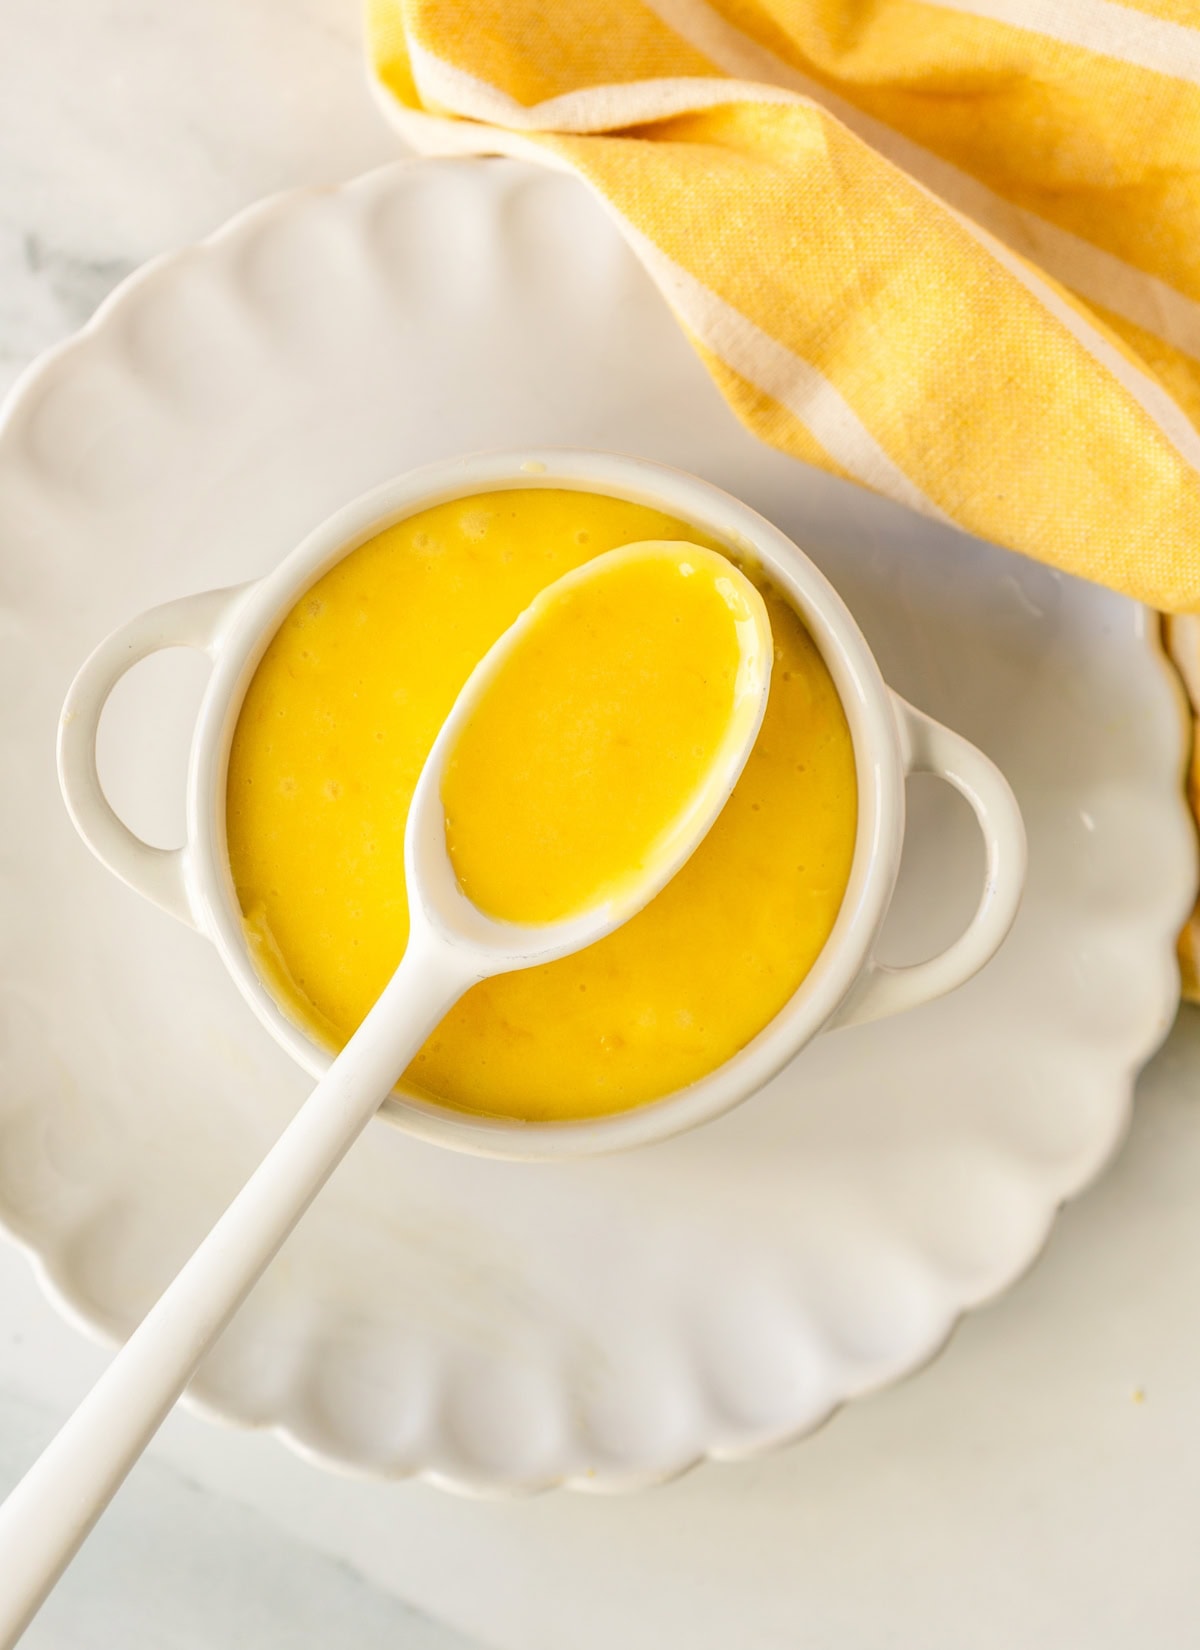
This is my go-to yuzu curd recipe — I make it on repeat! It’s fresh, zesty, and perfectly balanced between sweet and tangy.
You can also use this exact recipe to make classic lemon curd.
I love it spooned over a yogurt and granola bowl for breakfast, while my son enjoys it straight from the jar!
There are so many ways to use it: as a filling or topping for cakes (it’s amazing on this mascarpone limoncello cake!), swirled into cookies (like these lemon cream cookies), and more. You’ll find a full list of ideas below!
Ingredients
As I have said, this yuzu curd recipe, you only need 5 simple ingredients!
Here are my ingredients tips for the best results:
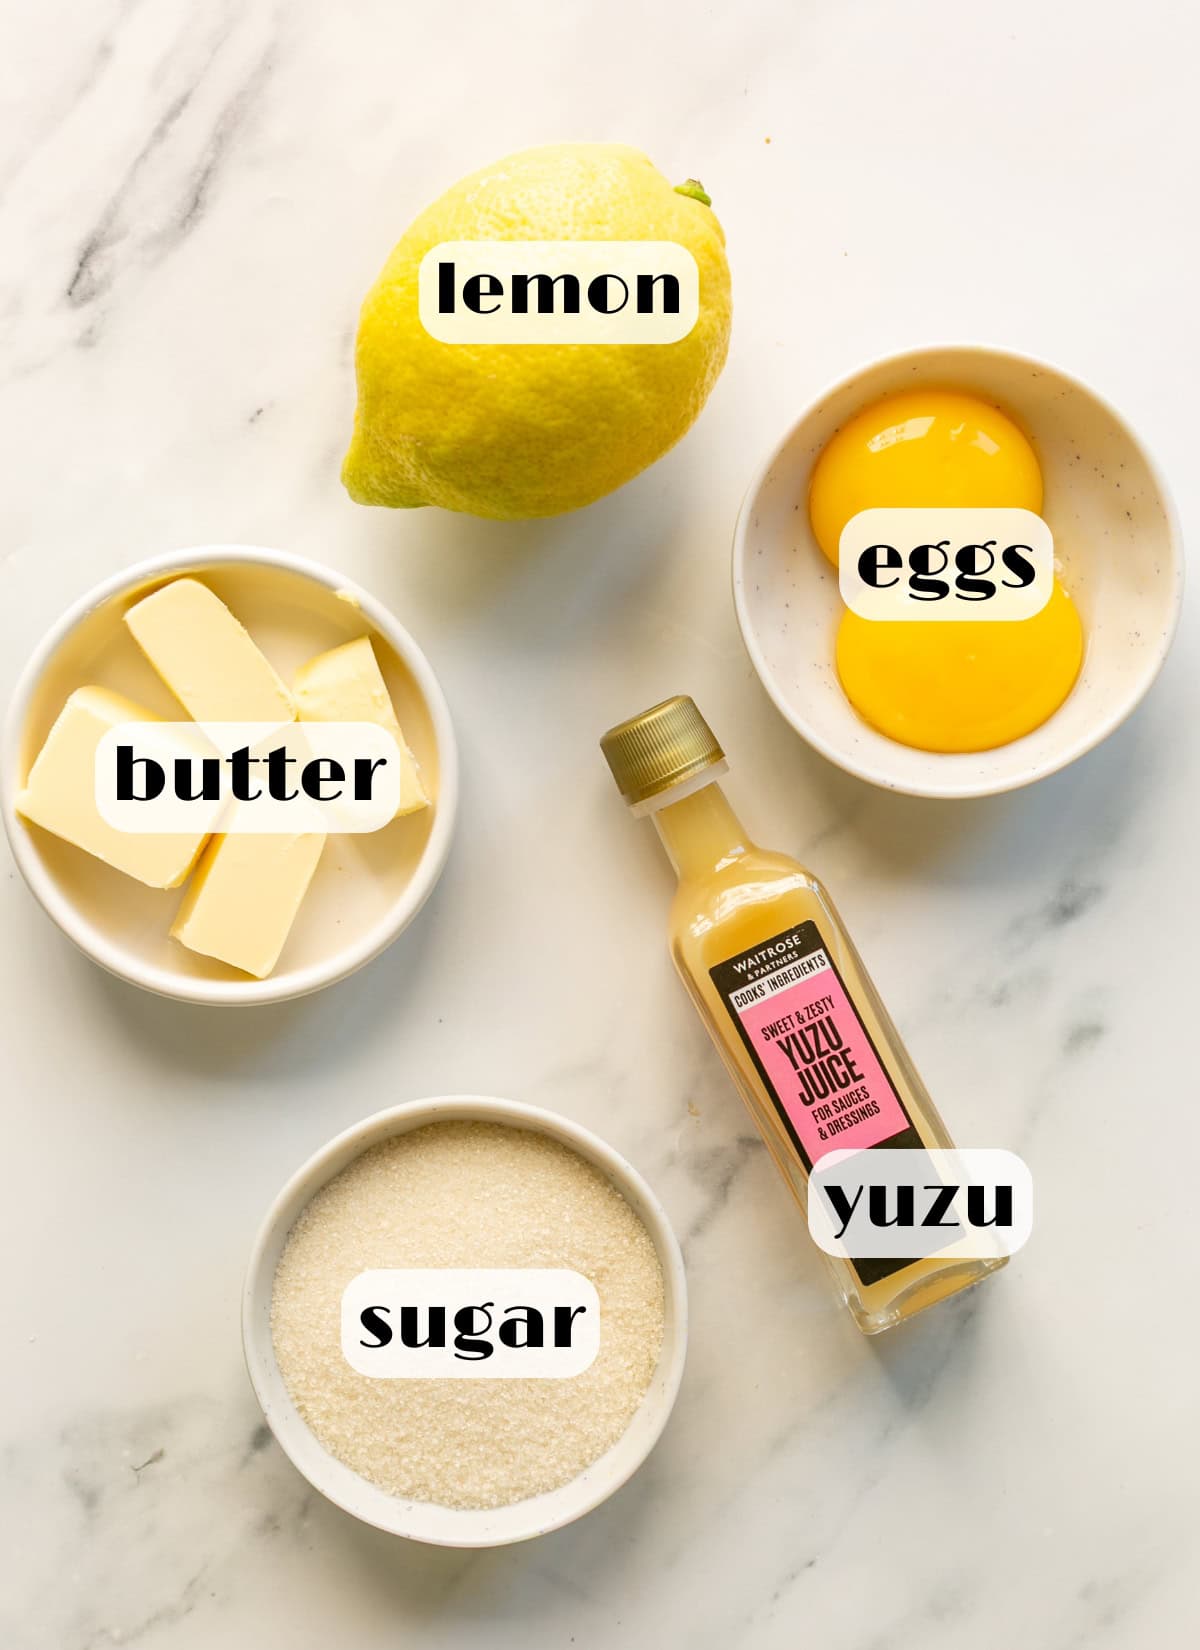
- Yuzu juice: Use 100% pure yuzu juice — you can usually find it in the international aisle at major supermarkets, at Asian grocery stores, or order it online.
- Butter: Use unsalted butter, and make sure it’s cold. Adding it at the end makes the curd smooth and glossy.
- Egg yolks: I use medium sized free-range eggs.
- Sugar: caster or granulated white sugar.
- Lemon: Fresh yuzu fruit is hard to find (and incredibly expensive!), so for the zest I use an organic lemon, or if you can find it, opt for Amalfi lemons or Meyer lemons, both have a very aromatic flavor.
- Salt: It's optional, but a little salt brings out the lemon flavor and balances the sweetness.
How to make yuzu curd
This simple yet delicious yuzu lemon curd recipe couldn't be easier to make!
All you need is about 15 minutes, and it's ready in just 4 simple steps.
Here below you can find the simplified recipe with step-by-step pictures, scroll down until the end of the post for the full printable recipe.
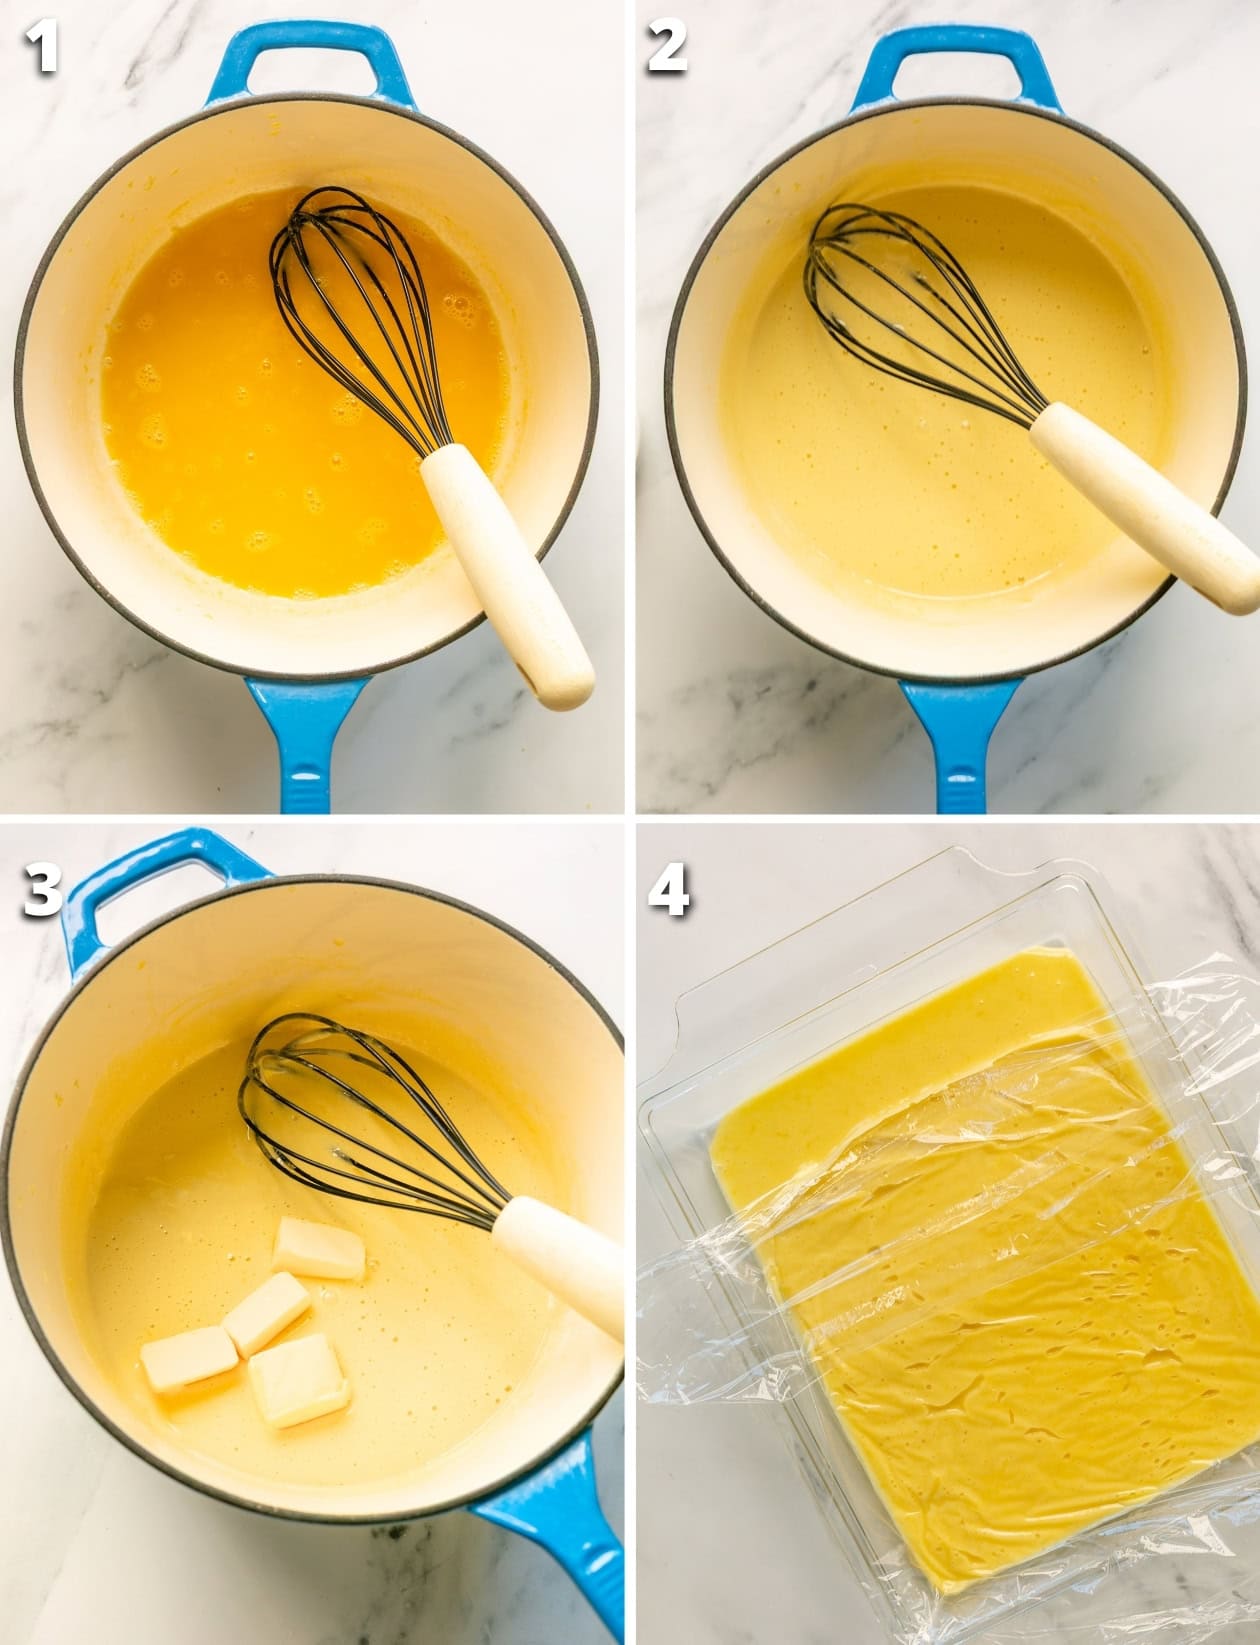
STEP 1. Combine egg yolks, sugar, lemon zest, lemon juice, and salt in a saucepan. Whisk with a silicone whisk until smooth.
Cooking tip: To avoid a metallic after taste, use a non-metallic pan, such as a ceramic coated pan or enameled cast iron sauce pan.
STEP 2. Continue whisking as the curd cooks to prevent curdling. Cook for about 10 minutes, or until the mixture thickens.
STEP 3. Remove the pan from the heat. Add cold butter in and whisk until smooth.
STEP 4. Pour the curd into a bowl or baking dish, then press a piece of plastic wrap directly onto the surface to prevent a skin from forming. Refrigerate for at least 30 minutes.
Cooking tips
Citrus curd is one of those delicious desserts that feels fancy — but it’s actually super simple when you know a few tricks.
I’ve made this curd more times than I can count (sometimes just to eat it by the spoonful 😅), and these are my go-to tips for getting it silky smooth, bright, and full of flavor.
- Whisk the eggs until they’re nice and smooth before turning the heat on.
- Thin pans heat too fast and unevenly. A heavy-bottomed saucepan helps keep everything smooth and steady.
- For the best flavor, use a ceramic-coated or enameled cast iron saucepan (like Le Creuset) or any non-reactive, heavy-bottomed pan.
- Wait until the curd thickens, then stir in cold butter. It gives the curd that glossy finish and makes it taste rich and dreamy.
- If you want your curd extra smooth, straining the curd through a fine sieve will catch any bits of zest.
Storage tips
- Cool completely first: Let the curd cool to room temperature before storing.
- Use an airtight container: A clean glass jar with a tight lid works best.
- Refrigerate: Store in the fridge for up to 5 days.
- Freeze: Yuzu curd freezes well! Place it in a freezer-safe container, leaving a little space at the top. Freeze for up to 3 months. Thaw in the fridge overnight before using.
What to do with yuzu curd
- Spread it on toast, scones, or pancakes
→ Try it on these soft and fluffy American pancakes, or these thin and delicious British pancakes. - Swirl into yogurt or oatmeal
→ Perfect in a simple yogurt bowl with granola and berries. - Use as a cake filling or topping
→ Spoon it over this dreamy limoncello cake, or this ciambellone cake. - Fill cookies, tartlets, or thumbprint cookies
→ Use it in these buttery, melt-in-your-mouth lemon cream cookies, or on top of these almond orange cookies. - Layer into trifles or parfaits
→ Add to this fresh and light limoncello tiramisu', or this classic Platinum Jubilee trifle for extra citrus flavor. - Stir into buttercream or frosting
→ Mix it into frosting for this olive oil orange cake. - Eat it by the spoonful
→ No recipe needed. Just grab a spoon and enjoy straight from the jar!
Did you try this recipe?
Please let me know how you liked it! Leave a comment below and share a picture on Instagram with the hashtag #thepetitecook!
Don't forget to subscribe to my newsletter and follow along on Facebook, Pinterest and Instagram for the latest updates.
Recipe

Yuzu Curd (5 Ingredients)
Ingredients
- 4 medium egg yolks
- 140 g sugar, approx ⅔ cup in US cups
- 85 ml yuzu juice, approx ⅓ cup + 1 teaspoon in US cups
- 1 tablespoon lemon zest, about 1 lemon
- a pinch of sea salt, optional
- 80 g unsalted butter, approx ⅓ cup +1 tablespoon in US cups
Instructions
- In a heavy, non-metal saucepan (see notes), combine the egg yolks, sugar, yuzu juice, lemon zest, and a pinch of salt. Set the pan over low heat and gently whisk everything together using a silicone whisk until smooth.
- Keep whisking constantly as the mixture cooks — this helps prevent the egg yolks from scrambling. Cook until the curd thickens to a pudding-like texture.
- If you’re using a thermometer, aim for around 165°F (75°C). If it’s taking too long to thicken, slightly increase the heat but continue whisking the whole time.
- Once thickened, take the pan off the heat and whisk in the cold butter until you have a fully combined, smooth curd.
- Transfer the yuzu curd to a bowl or shallow dish, and press a piece of plastic wrap directly onto the surface to prevent a skin from forming as it cools. The curd will set more as it chills.
- Store in the fridge and enjoy within 5 days.
Notes
Nutrition
The information shown is an estimate provided by an online nutrition calculator. It should not be considered a substitute for a professional nutritionist’s advice.


Leave a Reply