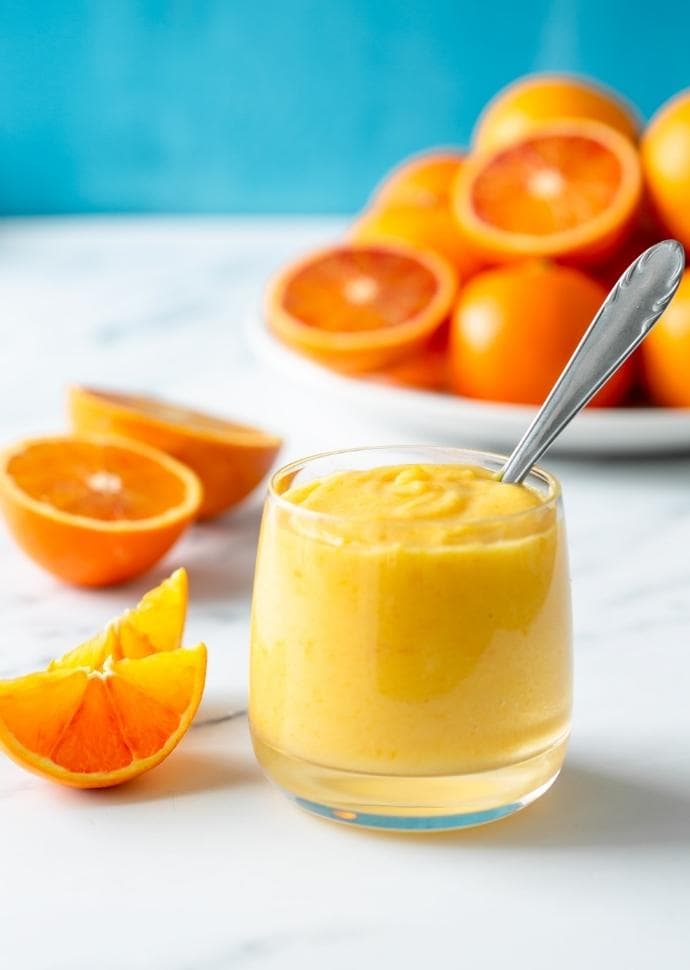
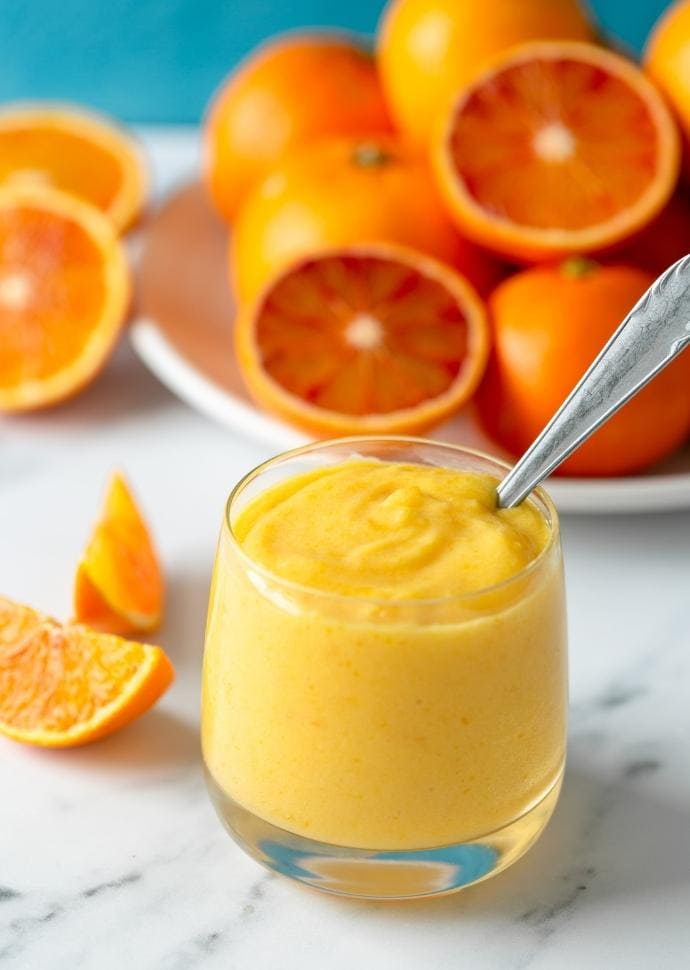
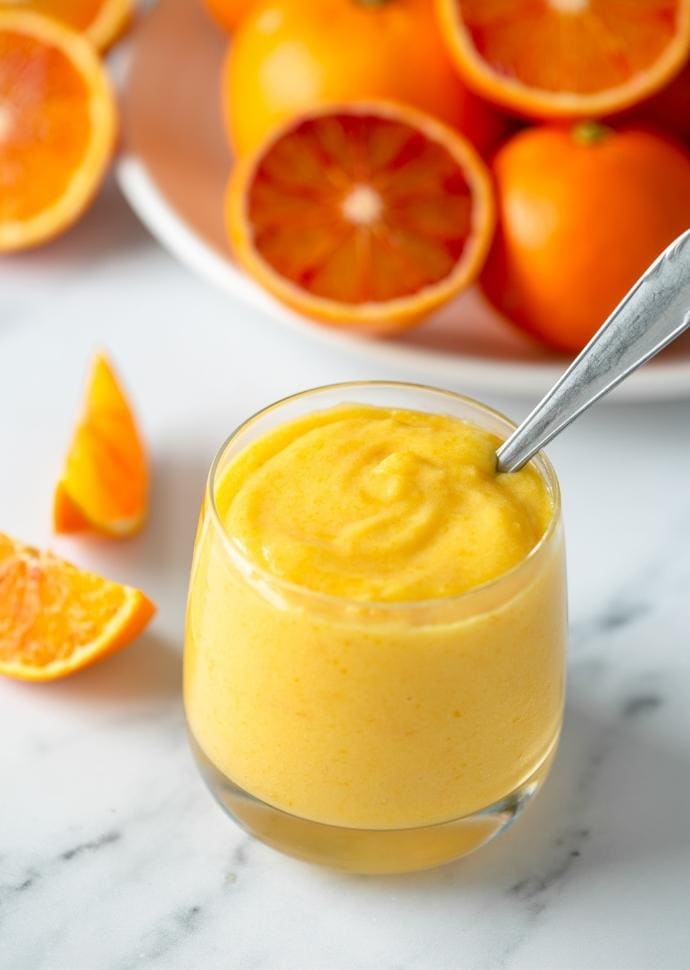
Orange Curd

This easy orange curd is deliciously citrusy, creamy, and sweet. You only need 4 ingredients and it comes together in 10 minutes!
There’s nothing quite like a simple, citrusy, homemade orange curd.
I promise you, once you make your own, you'll never buy the store-bought version again.
This easy orange curd recipe calls for 4 simple ingredients and 10 minutes of time.
It's perfect on toast, scones, crumpets, or drizzled on ice cream, and it turns out to be a fantastic filling for tarts, tartlets, cookies, and cakes!
Jump to:
WHAT IS ORANGE CURD
Orange curd is a dessert spread, topping, or filling. It’s creamy, buttery, and sweet with an intense orange flavor.
It’s halfway between a light pastry cream and a creamy orange flavoured jam.
INGREDIENTS
You're just 4 ingredients away to make the most delicious homemade curd. Pick the best ingredients whenever possible, it will make it even tastier!
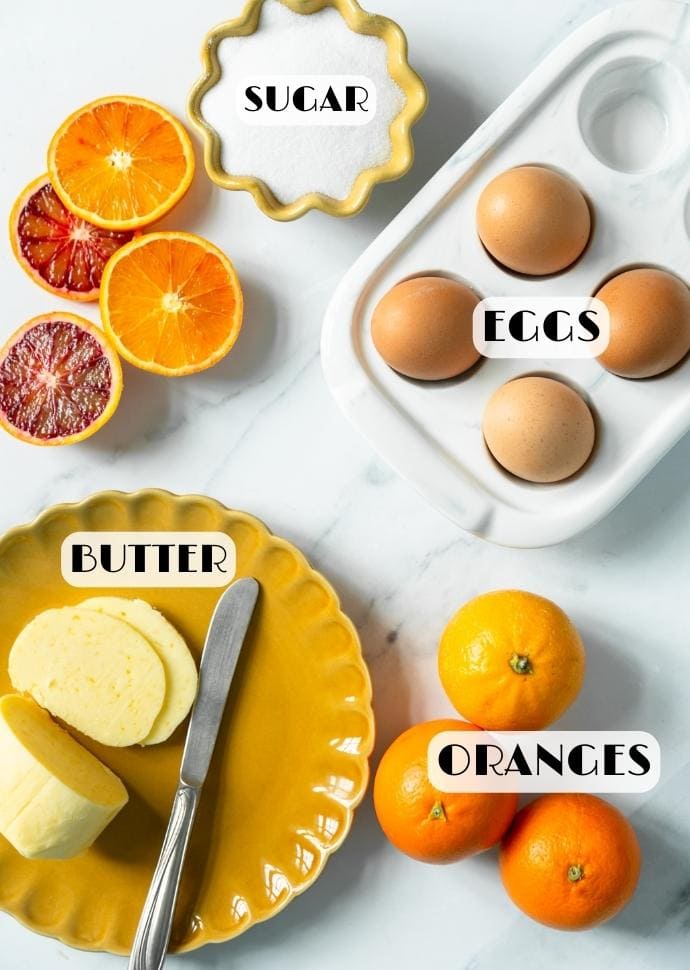
- Eggs: you'll need 4 medium eggs yolks. You can use the egg whites to make amaretti almond cookies!
- Orange: Use freshly squeezed orange juice. Pick organic oranges as you'll need the zest too. You can use blood oranges when they're in season or navel oranges.
- Butter: Use high-quality butter. I use salted butter, if you use unsalted butter, add a pinch of salt to your curd whilst is cooking.
- Sugar: Use regular caster sugar.
HOW TO MAKE ORANGE CURD
Making fresh orange curd is incredibly easy, here's the step-by-step recipe with pictures.
Scroll down until the end of the post for the printable recipe.
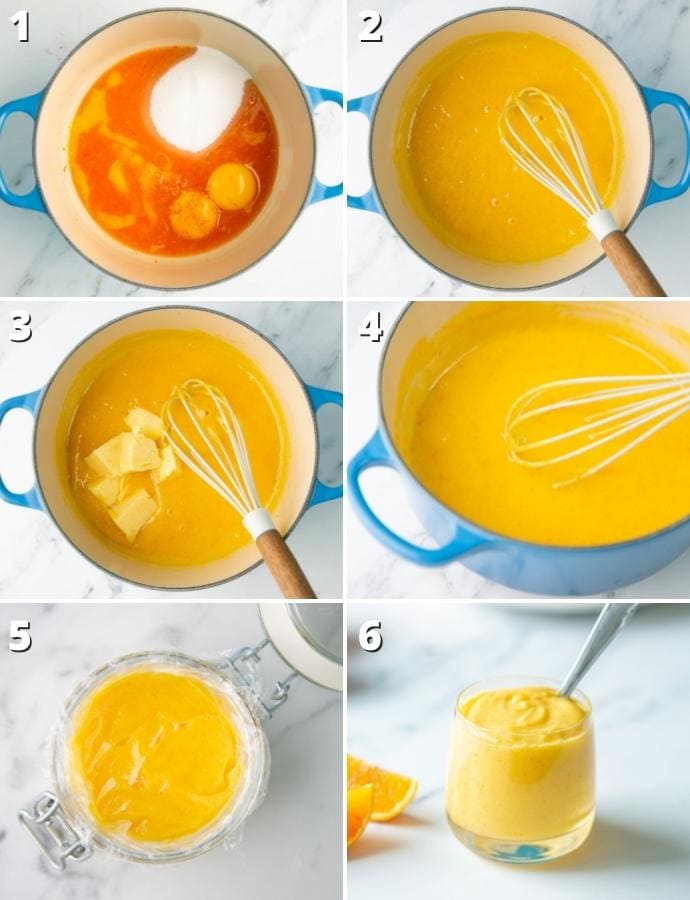
STEP 1 - Place the egg yolks, sugar, orange zest and juice, into a medium pot over low heat.
STEP 2 - Use a silicone whisk to whisk all ingredients until blended. Continue to constantly whisk gently, and cook for about 10 minutes, until the mixture becomes creamy, velvety, and thicker.
STEP 3 - Remove the pan from the heat. Add the butter chunks into the mixture.
STEP 4 - Whisk vigorously until you have a creamy and shiny orange curd.
STEP 5 - Pour the curd into a jar or bowl and cover with plastic wrap, making sure it touches the surface of the curd.
STEP 6 - As it cools, the curd becomes thicker. Once it's completely cool, you can refrigerate it until ready to use.
RECIPE TIPS
- Use a fine zester or Microplane grater to zest the orange. You can also use a vegetable peeler to peel the orange part of the zest, and pulse the rind in a food processor until minced.
- Strain the orange juice to avoid little pieces of orange flesh ending up in the mixture.
- Stirring constantly is important: if you don't stir enough, you will end up with scrambled eggs in your curd.
- Do not let the curd boil. Always cook on low heat and whisk constantly.
- The curd is ready when it reaches 76 C/170 F when checking with a kitchen thermometer. Alternatively, just cook it until it coats the back of a wooden spoon, it should be ready in about 10 minutes of cooking time.
- The curd won't be fully thickened to the thick creamy consistency while it's still hot, it will thicken as it cools.
- If you sterilize the jars, once the curd is ready, pour it immediately into the hot sterilised jars. Make sure you wear oven gloves.
- You don't need to strain your orange curd if you grate the zest finely. Alternatively, pour the finished curd through a fine-mesh sieve.
RECIPE FAQs
You can prepare the orange curd in a pan, if you’re careful it won’t burn and the eggs won’t scramble.
If you want to be on the safe side, use the double-boiler method.
Here's how to make a DIY double-boiler just with a heatproof glass bowl and a pan.
Eggs and oranges can react with metallic utensils and pans, which may give your orange curd a metallic after taste.
Use a silicone whisk and a ceramic-covered pot, or an enameled cast iron pan to prevent it, or opt for the double-boiler method.
Yes, freezing orange curd is my favorite method to preserve it.
Simply divide your prepared curd into freezer-friendly containers, and store in the freezer for up to 3 months.
Thaw in the refrigerator overnight before enjoying.
HOW TO STORE IT
Once ready, unless you sterilize the jars, the orange curd will keep well in the refrigerator for about 1 week.
To store in the fridge for a longer period, you need to sterilize the jars before using them. This will get rid of any bacteria which would spoil your homemade citrus curd.
Simply wash the jars and their lids in hot soapy water, and transfer them on a clean baking tray.
Put them in a preheated oven to 150°C/300°F for 10-15 minutes, then pour immediately the hot orange curd and seal the jars.
Allow them to cool then store them in the refrigerator.
HOW TO USE ORANGE CURD
There are so many ways to enjoy homemade orange curd. Here are a few suggestions:
- Spread it on toasted bread, english muffins, crumpets, scones.
- Serve it with crepes or British pancakes (or even on top of classic pancakes).
- Turn it into a tart. Bake a tart shell using my Italian sweet shortcrust pastry recipe, spoon just enough curd to fill it, decorate with berries and chill until ready to serve.
- Use it as a filling or topping in a cake or cheesecake. Try it with blood orange cake (perfect match!), ricotta cheesecake, clementine cake or gin lemon cheesecake.
- Stir it in yogurt, homemade mascarpone, or ice cream.
- Make and orange version of lemon bars, of course!
DID YOU MAKE THIS RECIPE?
Please let me know how you liked it! Leave a comment below and share a picture on Instagram with the hashtag #thepetitecook!
Don't forget to subscribe to my newsletter and follow along on Facebook, Pinterest and Instagram for all of the latest updates.
Recipe

Orange Curd
Ingredients
- 4 medium egg yolks
- 140 g sugar
- 120 ml fresh orange juice, strained
- 1+½ teaspoon fresh orange zest, finely grated
- 100 g butter, cut into chunks, if unsalted, add a pinch of salt
Instructions
- Place the egg yolks, sugar, orange zest and juice, into a medium pot over low heat.
- Use a silicone whisk to whisk all ingredients until blended. Continue to constantly whisk gently until curds form. Cook and whisk for about 10 minutes, until the mixture becomes creamy, velvety, and thick.
- Remove the pan from the heat. Add the butter chunks into the mixture and whisk vigorously until you have a creamy and shiny orange curd.
- Pour the curd into a jar or bowl and cover with plastic wrap, making sure it touches the surface of the cream (otherwise, as the curd cools down and gets in contact with air, it will form a thin crust over the surface).
- As it cools, the curd becomes thicker. Once it's completely cool, you can refrigerate until ready to use.
Video
Notes
- Use a fine zester to zest the orange. You can also use a vegetable peeler to peel the orange part of the zest, and pulse the rind in a food processor until minced.
- Strain the orange juice to avoid little pieces of orange flesh ending up in the mixture.
- Always stir. Stirring constantly is important: if you don't stir enough, you will end up with scrambled eggs in your curd.
- Do not let the curd boil. Always cook on low heat and whisk constantly.
- When is the curd ready? The curd is ready when it reaches 76 C/170 F when checking with a kitchen thermometer. Alternatively, just cook it until it coats the back of a wooden spoon, it should be ready in about 10 minutes of cooking time.
- Why is the curd not thick? The curd won't be fully thickened to the thick creamy consistency while it's still hot, it will thicken as it cools.
- No need to strain. You don't need to strain your orange curd if you grate the zest finely. Alternatively, pour the finished curd through a fine-mesh sieve.
Nutrition
The information shown is an estimate provided by an online nutrition calculator. It should not be considered a substitute for a professional nutritionist’s advice.
Great instructions, thank you.
Absolutely delicious result!
I had never made curd before, but needed something to go with my Italian orange cake.
I haven't had a lot of success with cooking food that requires thickening, but this worked perfectly.
As long as I have been cooking and baking, I royally screwed this one up! Not sure where it went south but I'll try again. At least I can use it as sauce, sort of an orange creme anglaise. I'm sure the recipe is perfect, more like user error here!
My husband and I made this and it turned out absolutely amazing! Thank you!